


Step by Step Guide to Assemble a Table Tennis Table
Ready to assemble your very own Table Tennis Table? You’re in the right place! Before you start, make sure you have a clean, open space and the right tools nearby. Check all the parts so you don’t miss anything important. Taking these steps helps you avoid mistakes and keeps you safe. Take your time and follow each step. You’ll end up with a sturdy table that’s ready for action.
Key Takeaways
-
Collect all the tools you need before you begin. This stops delays and helps you build the table easily.
-
Make sure your workspace is clean and flat. A soft area keeps your table safe from scratches while you build.
-
Look at all the parts closely before you start. This lets you find any broken or missing pieces early.
-
Build the table by following the steps for your table type. Each table is different, so check the manual for help.
-
Check for safety after you finish building. Make sure the table is steady, flat, and all screws are tight for safe use.
Preparation for Table Tennis Table Assembly
Gather Tools
You don’t want to stop in the middle of building your modern indoor table tennis table because you’re missing a tool. Before you start, grab everything you need. Most tables need these tools:
-
Socket spanner
-
Open-end spanner
-
Allen key
-
Screwdriver
Some tables come with tools in the box. Check the manual to see if you need anything extra. Lay your tools out where you can reach them. This makes the job much easier.
Set Up Workspace
Pick a spot that’s clean, soft, and level. A carpet or a large mat works well. This helps protect the table from scratches or dents. Make sure you have enough room to move around the table. If you have a foldable table, handle it with care. Move the table slowly and ask someone to help you if it’s heavy. Use the built-in wheels if your table has them. Never drag the table across the floor. Always lock the legs and support parts before you start working. Keep the surface clear of bags, tools, or drinks. This keeps your table safe and looking new.
Tip: Store your table upright or closed and covered if you need to put it away for a while.
Check Parts
Open the box and lay out all the pieces. Look at the instruction manual and match each part to the list. Check for any damage or missing items. If you find a problem, contact the seller before you start building. It’s much easier to fix issues now than later. Taking a few minutes to check everything saves you time and trouble.
Unboxing and Inspection
Open Packaging Safely
You finally have your ITTF table tennis table at home. Now, it’s time to open the box. Use a pair of scissors or a box cutter, but go slow. You don’t want to scratch the table or lose any small parts. Cut along the taped edges and avoid digging too deep. If you see any staples, remove them with pliers.
Lay the box flat on the floor. Open it from the top. Take out the instruction manual first. You might find small bags with screws or bolts inside. Put these in a bowl or tray so you don’t lose them. If you have a friend or family member nearby, ask for help. Some parts can be heavy or awkward to lift alone.
Tip: Keep the packaging until you finish building the table. You might need it if you have to return a part or store the table later.
Inspect Components
Now, check every part before you start building. Lay out all the pieces on the floor. Use the manual to match each part with the list. Look for anything that seems off.
Here are the most common issues you might spot:
|
Type of Damage |
|---|
|
Loose screws, nuts, and bolts |
|
Wear and tear on playing surfaces |
|
Damage to any moving parts or components |
Run your hand over the table surface. Feel for scratches or dents. Check the legs and frame for bends or cracks. Wiggle the screws and bolts to see if any feel loose. If you find a problem, take a photo and contact the seller right away.
You want your table to last a long time. A quick inspection now saves you from bigger problems later. Take your time and make sure everything looks good before you move on.
Assemble Frame
Identify Table Type
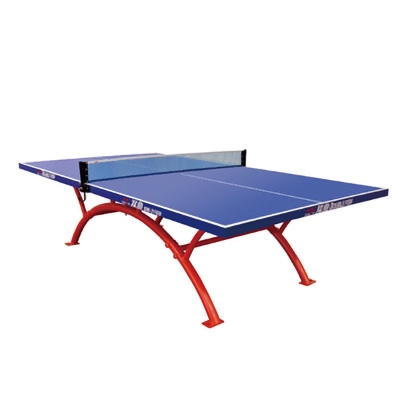
Before you start putting the frame together, you need to know what kind of table you have. Not all tables are the same. Some are made for indoor games, while others can handle rain and sun outside. You might have a professional table, or maybe you picked a foldable one for easy storage. Each type has its own steps and challenges.
Here’s a quick look at the main types and what makes them different:
|
Type of Table |
Characteristics |
Assembly Steps Differences |
|---|---|---|
|
Indoor Use Tables |
Designed for climate-controlled environments; smooth surface for accurate bounce. |
Needs careful setup for stability; usually lighter and easier to put together. |
|
Outdoor Use Tables |
Weather-resistant materials; tough for outdoor conditions. |
Heavier and takes more effort to secure; focus on making it stable. |
|
Professional/Tournament Tables |
Meets ITTF standards; precise size and high-quality materials. |
More complex setup; bigger and heavier, so you may need help. |
|
Recreational Use Tables |
Affordable and easy to use; often foldable for storage. |
Simple assembly; made for quick setup and moving around. |
Check your manual or the box for your table’s type. This helps you know what to expect. If you have a high-end model, you might find it almost fully assembled. Most other models take up to 30 minutes to put together.
Tip: If you feel unsure, watch a video or read the instructions before you start. This makes the process smoother.
Connect Frame Parts
Now, it’s time to build the frame. Lay out all the frame pieces on the floor. Match each part to the diagram in your manual. Start with the main beams and legs. Attach them using the bolts and screws from your kit. Tighten each connection, but don’t overdo it. You want the frame snug, not bent.
Here are some common mistakes people make and how you can avoid them:
-
Forgetting to check the assembly time. Look at the product description so you know how long it will take.
-
Rushing and damaging the frame or surface. Take your time and handle each part with care.
-
Missing tools. Make sure you have everything you need before you start.
-
Skipping the manual or videos. Get familiar with the steps first.
-
Not asking for help. If the heavy-duty outdoor table tennis table feels too heavy or confusing, ask a friend or hire someone who knows how to assemble a Table Tennis Table.
Most tables need two people for this step. One person can hold the parts steady while the other tightens the bolts. This keeps the frame straight and strong. If your table has wheels, attach them now. Make sure they lock in place.
Note: Always double-check each connection before moving on. A loose bolt can make the table wobble later.
When you finish, step back and look at the frame. It should sit flat on the floor. If it rocks or feels uneven, adjust the legs or check the bolts again. You want a solid base before you add the tabletop.
Attach Tabletop
Align Panels
Now comes the exciting part—putting the tabletop on the frame. You want to make sure both panels line up perfectly. Place each panel on the frame, one at a time. Start with the first panel and set it gently on the support bars. Check that the edges match up with the frame. If your Table Tennis Table has two panels, leave a small gap in the middle. This gap helps the net fit later.
Look at the corners. They should sit flat and not hang over the edge. If you see a gap or the panel looks crooked, slide it a little until it lines up. You can ask a friend to help hold the panel while you adjust it. This step makes the table look neat and helps the ball bounce right.
Tip: Use a measuring tape to check the distance from the edge of the panel to the frame. Both sides should match.
Secure Tabletop
Once the panels look good, you need to lock them in place. Find the screws, bolts, or clips that came with your table. Use your screwdriver or Allen key to fasten each panel to the frame. Start with the corners, then move to the middle. Tighten each fastener, but don’t use too much force. You want the panels snug, not cracked.
Check that the panels don’t move when you push on them. If you see any wobbles, tighten the fasteners a bit more. Make sure the surface feels even. If your Table Tennis Table has a foldable design, test the folding action now. It should move smoothly and lock back into place.
When you finish, step back and look at your work. The table should look flat and ready for the next step. You’re almost ready to play!
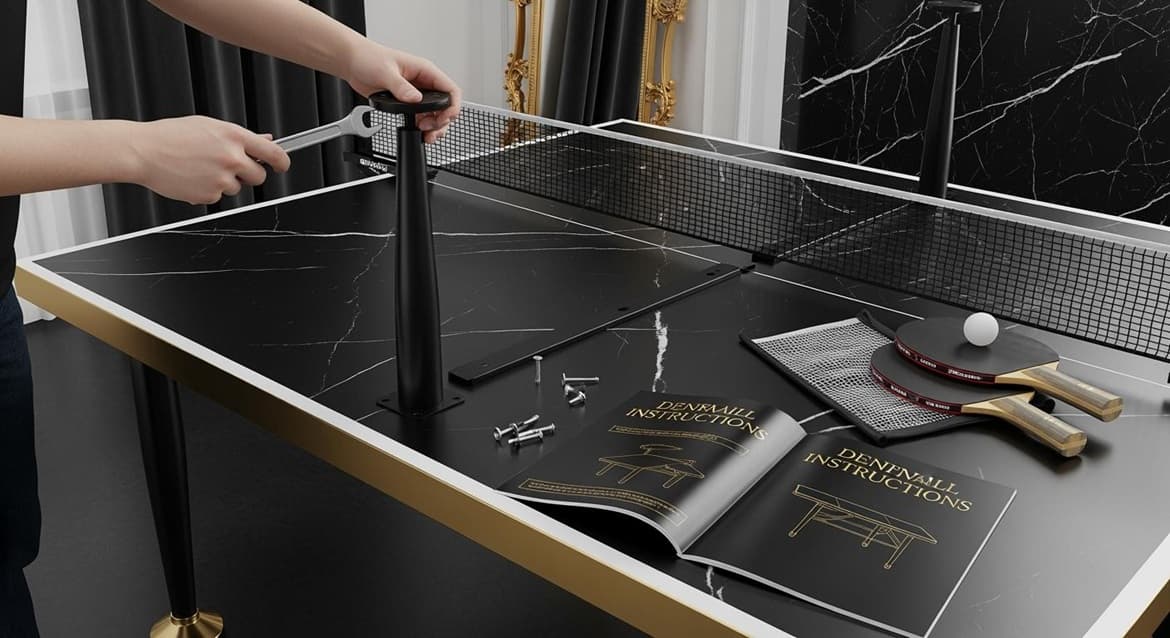
Install Net and Posts
Position Posts
You’re almost ready to play! Now, let’s set up the net posts. Take the posts out of the package and find the spots on each side of your table. The posts should sit just outside the sidelines. If you want to follow official rules, check the measurements in the table below:
|
Specification |
Measurement |
|---|---|
|
Height of net posts |
15.25 cm (6 in.) high |
|
Positioning of posts |
15.25 cm outside the sidelines |
Line up each post so it stands straight and tall. Make sure both posts are the same height. If your posts have adjustable clamps, open them wide enough to fit over the edge of the table. Place the posts gently to avoid scratching the surface. Tighten the clamps just enough to hold the posts steady. Don’t make them too tight. You want the posts to stay in place, but not damage your table.
Tip: Double-check that the posts are not leaning. A straight post helps your net stay even.
Attach Net
Now, grab your net. You want it to stretch from one post to the other. Here’s how you can attach the net for the best results:
-
Attach the posts carefully. Clamp them to the sides of the table gently. If you have adjustable clamps, tighten them just enough to hold the post firmly.
-
Set the correct net height. Make sure the net is 6 inches high at the center. Use a ruler if you need to.
-
Adjust the tension. The net should feel tight, but not too tight. Tap it lightly. It should give a little.
-
Center the net. Make sure the net sits evenly across the table. Check from both sides.
-
Check stability. Shake the net gently. The posts should not move, and the net should stay in place.
Take a step back and look at your work. The net should look straight and even. If it sags or leans, adjust the tension or the posts. Now your table looks just like the ones in real matches!
Note: A well-set net makes every game more fun and fair.
Table Tennis Table Safety Checks
You’ve finished putting your table together. Now, it’s time to make sure everything is safe and ready for play. Safety checks help you avoid accidents and keep your table in great shape for a long time. Let’s walk through the most important steps.
Test Stability
Start by checking if your table feels steady. Push gently on each side. The table should not wobble or tip. If you notice any movement, look at the legs and frame. Make sure all locks are secure and working. A stable table means you can play without worrying about sudden shakes or falls.
-
Push on the corners and sides to check for wobbling.
-
Make sure all locks click into place.
-
Look for any tilting or misalignment.
Tip: If you find a problem, fix it before you start your first game.
Level Surface
A level playing surface makes every game fair. Stand at one end and look across the table. The panels should line up and sit flat. If you see a tilt, adjust the legs or move the table to a flatter spot. You can use a small level tool if you have one, but your eyes work fine too.
-
Check both panels for even height.
-
Adjust the legs if the table sits on an uneven floor.
-
Make sure the net sits straight across the middle.
Check Fasteners
Loose screws or bolts can cause problems during play. Go around the table and check every fastener. Use your screwdriver or Allen key to tighten anything that feels loose. Don’t forget to check the net posts and clamps.
Here’s a quick table to help you remember what to check and how often:
|
Maintenance Check |
When to Check |
What to Do |
|---|---|---|
|
Table surface |
Monthly |
Look for cracks, dents, or warping |
|
Net and posts |
After setup |
Check height, tension, and clamp tightness |
|
Wheels and brakes |
Monthly |
Test for smooth rolling and secure brakes |
|
Fasteners and hinges |
As needed |
Tighten screws and bolts |
Taking a few minutes for these checks keeps your Table Tennis Table safe and fun for everyone.
Troubleshooting
Missing Parts
Sometimes, you open the box and find that something is missing. Maybe a bolt or a leg did not make it into the package. Don’t worry. First, check every bag and corner of the box. Small parts can hide in the packaging. Look inside the folded cardboard and under the flaps. If you still can’t find the missing piece, grab your instruction manual. Most brands include a customer service number or email. Contact them and tell them which part you need. Take a photo of your parts and the manual if you can. This helps the company send you the right replacement. While you wait, keep all your parts together so nothing else gets lost.
Tip: Save your receipt and packaging until your table is fully assembled and working.
Alignment Issues
You might notice that the panels or frame do not line up. This can make the table look crooked or cause the ball to bounce in strange ways. Start by loosening the screws or bolts just a little. Gently move the panels or frame until everything lines up. Tighten the screws again, but do not force them. If the problem continues, check if you mixed up any parts. Sometimes, using the wrong bolt or bracket can cause alignment problems. Double-check the manual and swap out any parts that look out of place. Ask a friend to help hold the panels while you adjust them. Two sets of hands make this job much easier.
Uneven Floors
A table that rocks or tilts can ruin your game. Floors are not always perfectly flat. You can fix this with a few simple tricks. Many tables come with adjustable leg levelers. Twist these to raise or lower each leg until the table sits flat. If your table does not have levelers, you can use shims. Place a small shim under the foot of the table that sits too low. Here’s a quick guide:
|
Method |
Description |
|---|---|
|
Adjustable Leg Levelers |
Twist these to make each leg the right height for a flat, stable table. |
|
Shims |
Slide a small shim under the foot to stop rocking on uneven floors. |
Check the table after each adjustment. Push gently on the corners to make sure it does not move. Now you can enjoy a smooth, steady game every time!
You did it! You built your Table Tennis Table and checked that everything feels safe and steady. Before you play, remember these tips for long-lasting fun:
-
Inspect the net often for sagging or holes.
-
Store your table with locked legs and use the wheels to move it.
-
Check the wheels and brakes every month.
-
Look for scratches or damage on the table top.
Enjoy your games and share your experience with friends. If you run into problems, check the troubleshooting section. Building your own table brings a lot of satisfaction and fun!
FAQ
How long does it take to assemble a table tennis table?
Most tables take 30 to 60 minutes to put together. If you have help, you can finish faster. Some tables come almost ready to use. Always check the manual for the best estimate.
Can I assemble the table by myself?
You can try, but it’s much easier with a friend. Some parts are heavy or awkward. Two people can keep the table steady and safe. You’ll also finish faster.
What should I do if I lose a screw or bolt?
Don’t panic! Check the box and packaging first. If you still can’t find it, contact us. Double Fish will send replacement parts quickly. Keep your manual and receipt handy.
How do I keep my table in good shape?
-
Wipe the surface with a soft cloth.
-
Store the table indoors or use a cover.
-
Check bolts and wheels every month.
-
Keep drinks and food away from the table.
A little care helps your table last longer!


 Overseas business:(020)8431 9554
 13751805037